Home Archives
Monthly Archives

August 2017

Hello Friends,

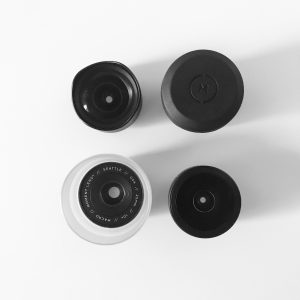
As you may recall from my previous post, I ordered the new Moment Tele Lens, but made the mistake of not realizing I needed a new mounting system too…which happens to be their phone case. In case (pun intended ;)) you didn’t guess, I caved and bought it! This video covers the new Moment mounting system.

Below I made a unboxing video for the phone case, along with a How To for converting your old lenses to fit the new system. If you are curious about the lenses, I think they are phenomenal and I am NOT SPONSORED. However, I have yet to formulate a full opinion on the case yet…I will get back to you all on this.

Enjoy!

Addendum: They are no longer selling the Moment Lens adapters and were only a transitional product. You can find some online from individuals who still have them. Although I recommend switching over your whole set if possible. They even have a trade in program.

0 Facebook Twitter Google + Pinterest

As some of you may know I use Moment lens on a regular basis. I bought three of their lenses when I bought my iPhone 7 Plus and they have transformed my photography. Moment has a new series of lenses out which are called V2 and are said to be new and improved.

The images below were taken with the original Moment Superfish lens.

I wanted to try the new lenses out, so I purchased the only one I did not own- the Tele. However, I made a more hasty purchase and did not even think about the fact that the new lenses have a new mounting system. The new system is an actual phone case, as opposed to the mounting plate that was attachable to you phone.

Future content will contain a unboxing and review of the new mounting system, transferring my old lenses over with adapters, and of course the photos I take with the new Tele lens. Watch the video below to the end for a snippet of my future plans for content that I did not mention above!

Thank you all! Don’t forget to subscribe to my e-mail list.

0 Facebook Twitter Google + Pinterest

The best phone case for the generally clumsy, the overly cautious and of course those who photograph with their phone.

I get lots of questions from my friends about the case that I use on my phone. I thought I would do a review of it for my very first video. It was pretty nerve racking putting my face on YouTube since I like to stay behind the camera, so thank you to all who supported me!

I have been using a Speck Presidio Grip phone case for about a year now and truly LOVE it.

Here are the affiliate links if you think this is the right case for you:

iPhone X

iPhone 7 Plus

Samsung Galaxy

Google Pixel

Lastly, I will be trying out the new Moment phone case soon since it is their new mounting system. You will see a video for unboxing and later a review for this.

See you all next time !

0 Facebook Twitter Google + Pinterest

On August 21st at approximately 10:19am (in Vancouver WA) there will be a solar eclipse!  To see if the eclipse will be visible in your area click here and enter your city.

Use your phone to photograph the eclipse…. Below is how I plan on capturing the eclipse on my smartphone.

1. Practice First

Start taking some photos of the night sky or moon using the tips below so you feel prepared for shooting in a low light setting.

Ireland at Midnight taken with iPhone 7plus

2. Protect Eyes

Run down to your local store or grab a pair of solar eclipse glasses off Amazon.  I bought one for myself, and one to use over my lens. A solar filter will be helpful for toning down the sun as you photograph and can even allow for that ring of light to appear.

3. Tripod

Use a tripod to stabilize the camera. Since it will be low light, shake and movement will easily cause your photos to be grainy or blurry. I would suggest having a tripod and mounting bracket for your phone to remove this risk and allow for flexibility in shooting, such as a timelapse video or burst.

0 Facebook Twitter Google + Pinterest


Portrait mode feature is new to the iPhone 7 Plus phones and has been a significant reason individuals choose to upgrade their phone.

The iPhone 7 Plus has two cameras:  wide angle f 1.8 aperture and a telephoto f 2.8 aperture. The iPhone 7 plus shoots at 12MP and has 2x optical zoom, 10x digital zoom. The second camera (telephoto) which shoots at f 2.8 is what portrait mode uses. For all the specs on the phone check here. Unfortunately, the second camera is only on the 7 plus and not on other models.

I have an iPhone 7 Plus and have found this phone to be comparable to a DSLR if you are able to have one with enough storage (32GB), the right apps, and a few pieces of tech. I will be coving these in future posts, so stay tuned.

What does Portrait Mode Do?

0 Facebook Twitter Google + Pinterest

Everyone wants to be able to take a stunning portrait of their friend, sister and especially their fur babies. Here are  3 basic considerations for taking a better portrait. You can use all or only a few with your next photo session. Let me know how it works out!

1.  Choose your background 

Selecting a minimal background or one that adds interest is essential for a decent portrait. Things to look for in a background include:

  • Textures – this could be a classic brick wall, a textured wood or industrial metal.
  • Objects to frame the subject- This is called using leading lines (which I will talk about in future posts). You can look for a line of trees, the way the light falls  in order to bring more attention to the subject.
  • Removing distractions- This is probably most essential. Consider the focus of the portrait and remove any “busyness” .

2. Position the Subject

While candid shots can be incredible, and often are my favorite to shoot. If your intention is to take a traditional or focused portrait this means posing the subject. How do you pose? Here is a short list of ideas:

0 Facebook Twitter Google + Pinterest